Nativity of Baby Jesus 3D Light Box: A Meaningful Christmas Decoration
The Nativity of Baby Jesus 3D Light Box is a unique and creative way to celebrate the Christmas season. This intricate design captures the essence of the holy night, depicting Baby Jesus in the manger with people praying under a starry sky. It’s more than just a decoration; it’s a symbol of faith, tradition, and cultural heritage that resonates with many around the world.
Whether you're a hobbyist, a creator, or someone looking for a meaningful way to express your beliefs, this 3D light box offers a hands-on project that can be both rewarding and beautiful. With simple materials and clear instructions, you can bring this scene to life in your home or as a gift for others.
Understanding the Nativity of Baby Jesus 3D Light Box
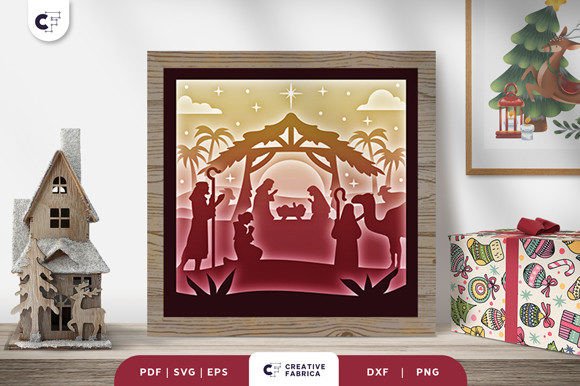
The Nativity of Baby Jesus 3D Light Box is designed to showcase the story of the birth of Christ through layered paper elements and subtle lighting. It features seven layers, each adding depth and detail to the overall scene. The final size is 20.32×20.32 cm, making it a compact yet impactful piece of art.
This design is available in multiple formats, including SVG, PDF, EPS, PNG, and DXF, giving users flexibility in how they choose to create or modify the project. The use of LED strips adds a soft glow, enhancing the visual appeal and creating a serene ambiance that reflects the peaceful nature of the nativity scene.
Common Mistakes When Working With a Nativity of Baby Jesus 3D Light Box
While the Nativity of Baby Jesus 3D Light Box is a great project, there are several common mistakes that users may encounter. One of the most frequent issues is not properly aligning the layers. If the layers are not placed correctly, the final result may look uneven or lose its intended depth.
Another mistake is using incorrect materials. For example, some may opt for lower-quality paper that doesn’t hold up well during the cutting and assembly process. The recommended material is Encore Cardstock 80 lb cover at 216 gsm, which provides the right balance of durability and ease of use.
Additionally, some users might overlook the importance of proper lighting. While LED strips add a nice touch, improper placement can lead to an unbalanced glow that distracts from the scene rather than enhancing it.
How to Avoid Common Errors and Improve Results
To avoid these issues, start by carefully following the provided tutorial. Cut each layer precisely, ensuring that all parts fit together seamlessly. Use a cutting machine or a sharp knife for accuracy, and take your time to make clean cuts.
When assembling, apply glue sparingly and use double-sided tape to secure the layers in place. This will help maintain the structure without causing any damage to the paper. Also, test the LED strips before attaching them to the frame to ensure they provide even illumination.
Before beginning, check the file formats and ensure you have the necessary tools and materials. If you’re unsure about the quality of your paper, consider purchasing from a trusted source like the 12×12 Cardstock Shop, which offers high-quality materials at reasonable prices.
Realistic Examples and Better Approaches
Imagine a scenario where someone starts the project without checking the material quality. They might end up with a fragile box that falls apart after a few days. By choosing the right cardstock, they can ensure their creation lasts longer and looks more professional.
Another example is when a user skips the testing phase for the LED lights. Without proper placement, the lighting might be too bright or too dim, affecting the overall mood of the scene. Testing the lights beforehand allows for adjustments that enhance the visual experience.
What to Check Before Making a Decision
Before diving into the project, take a moment to review the specifications and requirements. Ensure you have access to the necessary tools, such as a cutting machine or a knife, and understand the steps involved in the assembly process. Also, consider the time and effort required to complete the project.
If you're new to 3D light boxes, look for tutorials or guides that explain the process in detail. These resources can help you avoid pitfalls and improve your chances of success. Additionally, read reviews or ask for recommendations from others who have completed similar projects.
Conclusion: A Thoughtful and Meaningful Project
The Nativity of Baby Jesus 3D Light Box is more than just a craft project—it’s a meaningful way to connect with the spirit of Christmas. By understanding the design, avoiding common mistakes, and taking the time to assemble it properly, you can create a beautiful and lasting decoration.
Whether you’re celebrating with family, sharing the scene with friends, or using it as a personal reminder of faith, this project offers a unique opportunity to reflect on the significance of the holiday season. With careful planning and attention to detail, you can bring the serenity of the holy night into your home.