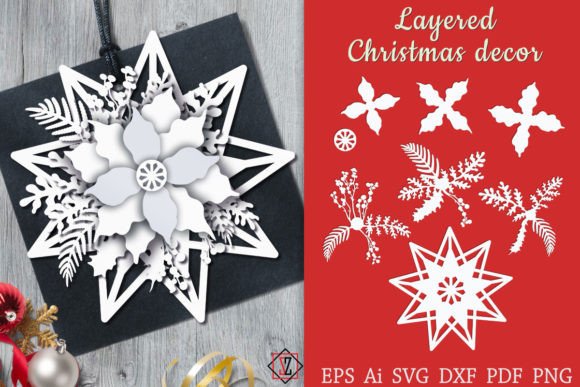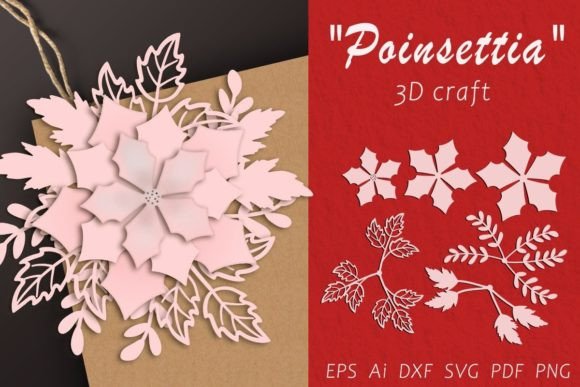
3D Christmas Craft Poinsettia Guide
There is a special kind of magic in transforming flat materials into something that fills a room with holiday spirit. A 3D Christmas Craft Poinsettia offers exactly that opportunity, bridging the gap between digital design and tangible decoration. Whether you are a seasoned crafter with a workshop full of tools or a beginner looking for a meaningful weekend project, layered floral designs provide a versatile foundation for creativity. These projects are not just about cutting paper; they are about understanding depth, texture, and the joy of assembling something beautiful by hand.
The appeal of a layered Poinsettia Christmas bouquet lies in its simplicity and its dramatic visual impact. Unlike traditional flat ornaments, these crafts utilize multiple silhouettes stacked upon one another to create volume and realism. When you cut out each layer and fasten them together, the result is a voluminous bouquet that mimics the lush look of real flowers without the maintenance. This approach allows you to bring the classic red and green aesthetic of the season into your home in a way that feels fresh and modern.
Why Layered Designs Elevate Your Decor
One of the primary reasons creators gravitate toward 3D floral projects is the control they offer over the final outcome. While many sets come with pre-colored layers ready to assemble, the true potential is unlocked when you customize the materials. You can cut these silhouettes in any color and texture you want to create your own unique craft. Imagine swapping the traditional crimson for a shimmering gold cardstock to match a specific party theme, or using patterned scrapbook paper to add a rustic touch to a farmhouse-style mantle.
This flexibility makes the 3D Christmas Craft Poinsettia an excellent choice for various goals. For homeowners, it solves the problem of finding decor that fits a specific color palette without breaking the bank. For small business owners and entrepreneurs, it provides a scalable product idea. Handmade bouquets made from high-quality materials can be sold as premium holiday gifts, wreath additions, or table centerpieces. The ability to produce consistent, professional-looking results from a single digital file set is invaluable for those looking to turn a hobby into a side income.
Versatility Across Different Contexts
The applications for these layered designs extend far beyond a simple vase filler. In an educational setting, teachers can use simplified versions of these projects to teach students about geometry, symmetry, and fine motor skills. Assembling the layers requires patience and precision, making it a wonderful activity for classroom holiday parties or after-school clubs.
For bloggers and content creators, documenting the process of building a voluminous bouquet offers engaging visual content. The transformation from flat sheets to a blooming flower is inherently satisfying to watch, making it perfect for social media tutorials or DIY blog posts. Marketers can also leverage these designs for seasonal campaigns, creating eye-catching physical props for photo shoots that stand out more than digital graphics ever could.
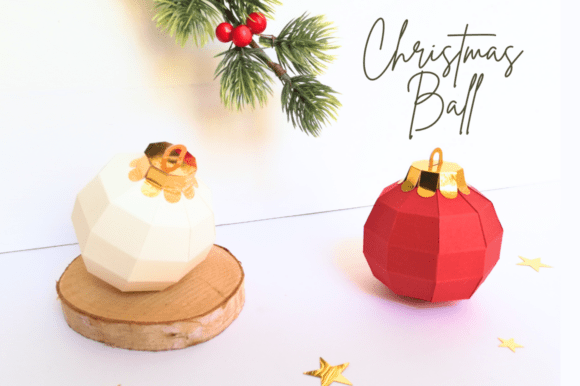
Even in professional event planning, these crafts serve a purpose. They are lightweight and durable, making them ideal for large-scale installations where real flowers would be too expensive or perishable. You can create massive walls of poinsettias for a holiday gala or delicate boutonnieres for a winter wedding, all derived from the same core design files.
Understanding the Technical Details
To get started, it is helpful to understand what you are working with digitally. A comprehensive set typically provides a wide choice of file formats to ensure compatibility with your preferred method of creation. After downloading, you will generally receive a general file in EPS10, SVG, AI, DXF, and PDF formats. Additionally, having a separate file for each layer in SVG, PDF, and PNG (with a transparent background at 300 dpi) gives you maximum flexibility.
If you own a cutting machine like a Cricut or Silhouette, the SVG or DXF files will allow the machine to recognize the cut lines precisely. However, if you prefer working manually, the PDF and PNG files serve as excellent templates. You can print them out, trace them onto your chosen material, and cut them with scissors or a craft knife. This inclusivity ensures that the barrier to entry is low; you do not need expensive hardware to participate in this trend.
It is crucial to note that the RGB color profile is often used for the digital previews. This means the print color may differ from what you see on your screen. Monitors emit light, while printers use ink or toner, leading to natural variations in hue. Always test a single layer before committing to a full batch of cuts, especially if color matching is critical for your project.
Material Selection and Assembly Tips
The success of a 3D project often hinges on the material you choose. In order for the layers to cut better and keep their shape, it is highly recommended to cut from a denser material. Standard printer paper is usually too flimsy to hold the structural integrity required for a standing bouquet. Instead, opt for cardstock ranging from 65lb to 110lb cover weight. For a more luxurious feel, consider textured papers, vellum for translucent effects, or even thin foam sheets for added dimension between layers.
When assembling, the method of fastening matters. Using adhesive dots or foam tape between layers can enhance the 3D effect by creating shadows and separation, whereas liquid glue might flatten the design if applied too heavily. Start from the largest layer at the bottom and work your way up to the smallest center piece, ensuring each layer is centered unless you are aiming for a stylized, asymmetrical look.
Important Considerations Before You Begin
Before purchasing or downloading any design set, there are a few practical steps to take. First, please make sure you have the correct software to open and use the files. While PDFs are universally accessible, editing AI or EPS files requires vector graphic software like Adobe Illustrator or free alternatives like Inkscape. Secondly, verify your hardware compatibility. If you plan to use a cutting machine, check that it supports the file types provided and that your mat size accommodates the dimensions of the flower layers.
Additionally, consider the scale of your project. Digital files can be resized, but enlarging them too much might reveal pixelation in raster formats like PNG, or require thicker materials that your cutting machine cannot handle. Conversely, shrinking them too small might make the intricate details of the petals difficult to cut or weed.
Creating a 3D Christmas Craft Poinsettia is a rewarding experience that blends technology with traditional handiwork. It invites you to slow down during the busy holiday season and focus on creating something tactile and beautiful. Whether you are decorating your own home, teaching a class, or building inventory for a shop, these layered designs offer a reliable and creative solution. With the right materials and a bit of patience, you can transform simple digital outlines into a stunning centerpiece that captures the warmth of the holidays.
If you encounter any challenges with file formats or assembly techniques, remember that support is usually available. Most creators encourage users to reach out if questions arise, ensuring that your crafting journey remains enjoyable and stress-free. Happy crafting!